Resizing your Photos
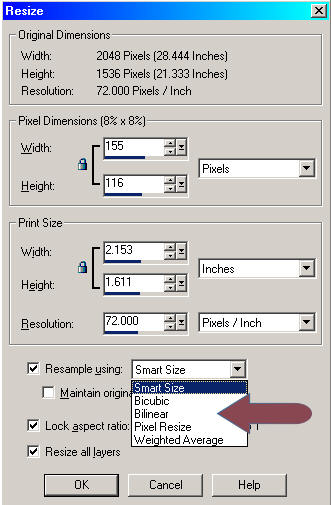
I was asked to do a tutorial on the different techniques of saving a photo in PSP. I am not that well versed on what the different menu choices are in the screen shot below as I usually always use "Smart Size". So, I thought this was a good opportunity to do some research on the subject. The best tutorial I found was under "Help" in PSP itself.
Below is a screen shot of where you can find the different options under Image/Resize: Smart Size, Bicubic, Bilinear, Pixel Resize and Weighted Average.
Here is what the Help menu in PSP 8 tells us about resizing:
To increase or decrease the pixels in an image:
Choose Image/Resize (Shift + S) to open the Resize dialog.
To resize the current layer only,
clear the "Resize all Layers" check box.
Mark the Resample using check box and select a resampling type.
Note: Bilinear, bicubic, and weighted average resampling are available only for greyscale and 16 million color images.
Smart Size: Use this type in most cases. Based on the new pixel dimensions you set, Paint Shop Pro chooses the best algorithm listed below.
Weighted Average: Uses a weighted-average color value of neighboring pixels to determine how newly created pixels will appear. Use this type when reducing photo-realistic, irregular, or complex images.
Bilinear: Uses the two nearest pixels around each existing pixel to determine how newly created pixels will appear.
Bicubic: Minimizes the jaggedness that often results from expanding an image by estimating how the newly created pixels will appear. Use this type when enlarging photo-realistic, irregular, or complex images.
Pixel Resize: Duplicates or removes pixels as necessary to achieve the selected width and height of the image. Use this type with hard-edged images and simple graphics.
To constrain the new image dimensions to the image’s current proportions, mark the check box. The aspect (width-to-height) ratio defaults to the ratio of the active image. Changing the aspect ratio distorts the image by stretching or contracting it in one dimension more than the other.
To keep the image’s current print size, mark the Maintain original print size check box. The image resolution will change, keeping the print size constant. For information on selecting image resolution, see About Image Size, Resolution, and Color Depth under Help.
In the Pixel Dimensions group box, enter the new Width and Height values. From the drop-down list, choose whether to enter values in pixels or as a percent of the original size.
Click OK.
To change the resolution (print size) of an image:
Choose Image Resize (Shift + S)to open the Resize dialog.
Clear the Resample using check box.
In the Print Size group box, enter the new Width and Height values or the new Resolution value. Choose measurement systems from the drop-down lists. For information on selecting image resolution, see About Image Size, Resolution, and Color Depth under Help.
My suggestion is to take a photo and play with the different methods of saving to see which one works best.
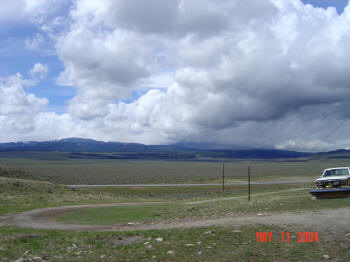
Here is one of my photos from home. I took a picture from 2048x1536 pixels down to 350x262 pixels and then used the jpeg optimizer at 25%.
Here are the results: